
Creating a VM
This guide describes how to create a virtual machine (VM) from a template in VMware Cloud Director.
Prerequisite: you are already logged in to VMware Cloud Director and have a reachable network. If no network exists yet, first follow the guide Setting Up the Network (Network, NAT, Firewall).
Creating a new VM
Section titled “Creating a new VM”Using a template
Section titled “Using a template”-
In the main menu, click the
Data Centerin which you want to create the VM. -
Under
Compute, click theVirtual Machinestab. -
Click
NEW. -
Give the machine a name. This also sets an identical computer name, which can be changed if needed.
-
For
Type, chooseFrom Template. -
Under
Power on, decide whether the machine should be powered on immediately after creation or created in a powered-off state. -
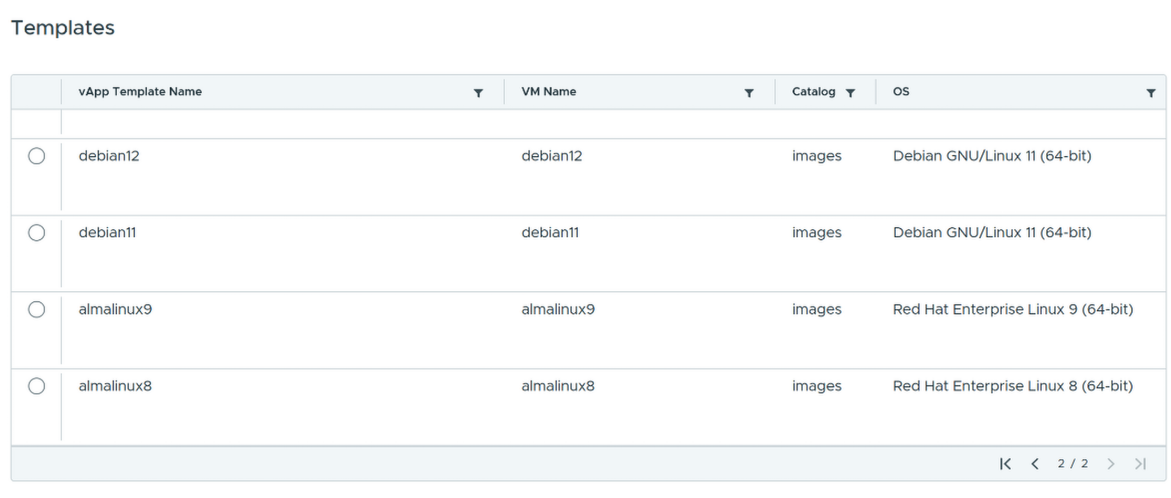
Choose one of the templates from the list, for more information on the available templates and their specifics, see the templates documentation.
-
Choose the desired
Storage Policy. -
Configure the
Network Interface:-
Enable
Connected. -
Choose the network you created earlier.
-
For the IP mode, you have the following options:
Static IP-Pool(automatic assignment from a pool defined in the network),Static Manual(specify an IP address yourself from the network’s IP range),DHCP(if a DHCP server is configured on the Edge Gateway for the network), orNone(no assignment by VMware Cloud Director).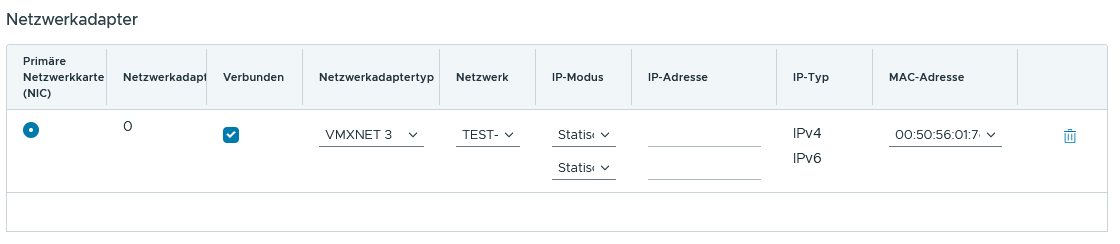
-
-
Optionally, under
Custom Propertiesyou can specify further options, depending on the template, used for cloud-init configuration (see Templates). -
If necessary, accept the EULA (depends on the chosen template).
-
Click
OK. -
Your new virtual machine is now created and, if selected earlier, starts immediately.
-
Depending on the chosen template, cloud-init continues configuring the guest operating system. Otherwise, make the settings yourself via the
VM Consolewithin the VM.
You have now successfully created a VM in the nEC and are ready to further optimize and use it for your specific requirements.
Data portability
Section titled “Data portability”Various options are available for exporting your data, documented in the VMware Cloud Director documentation.
Securely overwriting and deleting content
Section titled “Securely overwriting and deleting content”To securely delete all volumes of a VM, the ShredOS x86_64 - Disk Eraser is a good option, it offers a variety of deletion methods, including DoD-standard wiping.
Usage is simple: administrators first mount the ISO file via VMware Cloud Director into the desired VM. After booting, they select the desired overwrite mode and start the deletion process. Before using the tool, backups should be created and it should be ensured that no important data is accidentally deleted.
For securely deleting individual volumes on Windows, the tool Eraser is a good choice.