Gardener Kubernetes
The noris Sovereign Cloud (nSC)‘s Gardener platform automates management and operation of Kubernetes clusters as a service. You can find more information in Gardener’s documentation.
Getting Started
Section titled “Getting Started”This section will walk you through the steps to create, access and manage your first Kubernetes cluster with nSC.
Access the dashboard
Section titled “Access the dashboard”Our dashboard in Nuremberg (“NBG”) is available here: dashboard.ingress.garden-runtime.k8s.nsc02.noris.cloud
Create a cluster
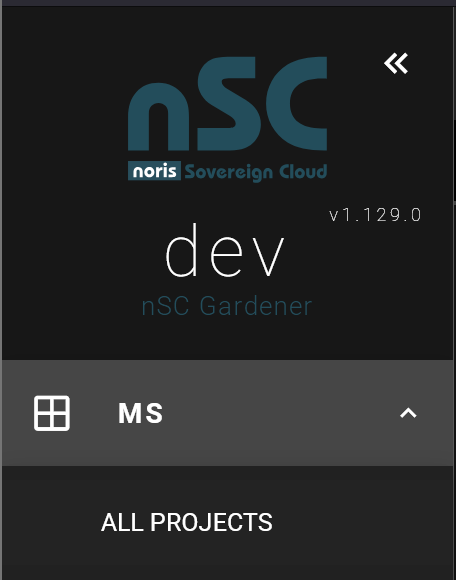
Section titled “Create a cluster”Should you have access to multiple projects, make sure to choose the correct project from the dropdown on the left sidebar:
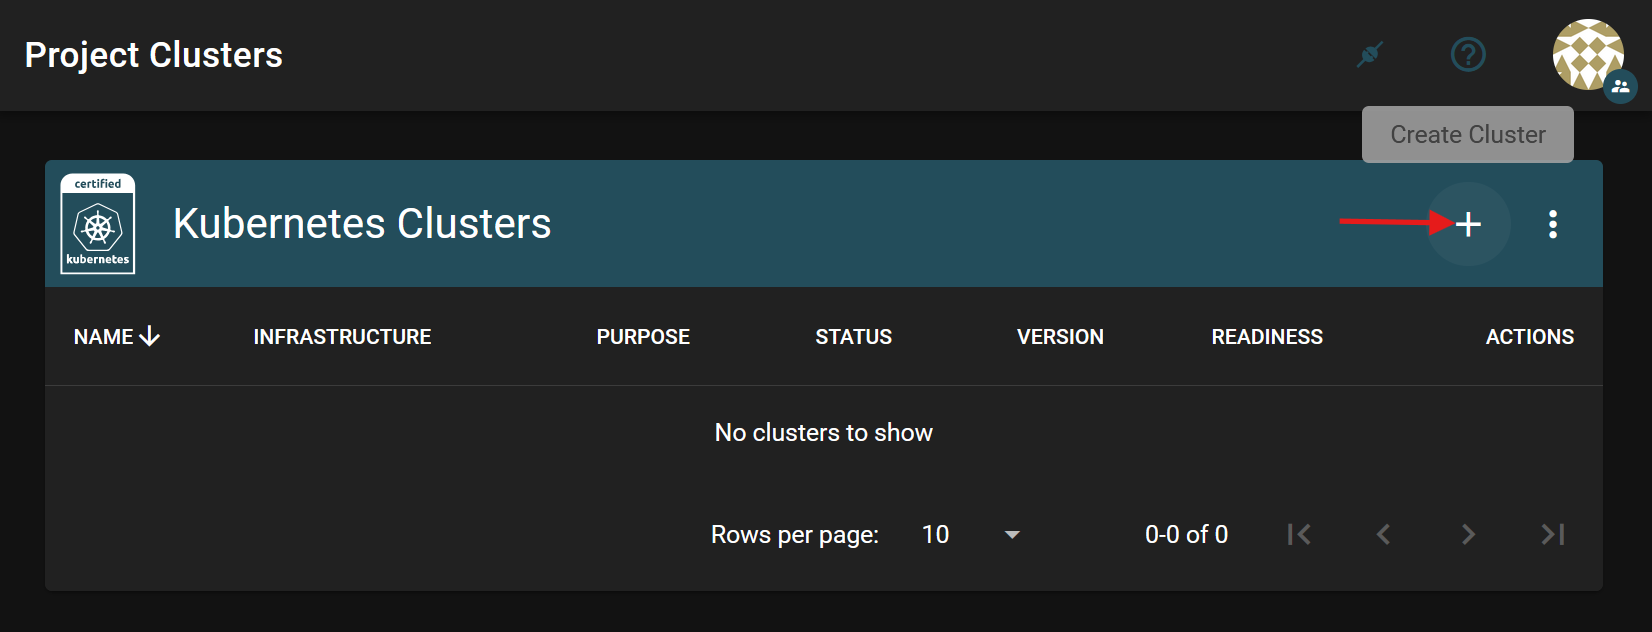
Click the ”+” button at the top to begin creating a new Kubernetes cluster, or “shoot” in Gardener terminology.
Configuration
Section titled “Configuration”The cluster configuration interface allows you to customize the cluster settings according to your needs. For better readability, only settings that usually need user attention are documented here.
Infrastructure
Section titled “Infrastructure”Gardener currently only supports our own nSC OpenStack as infrastructure provider. Should your use case require deployment on popular hyperscalers, please contact your sales representative for a quote.
Cluster Details
Section titled “Cluster Details”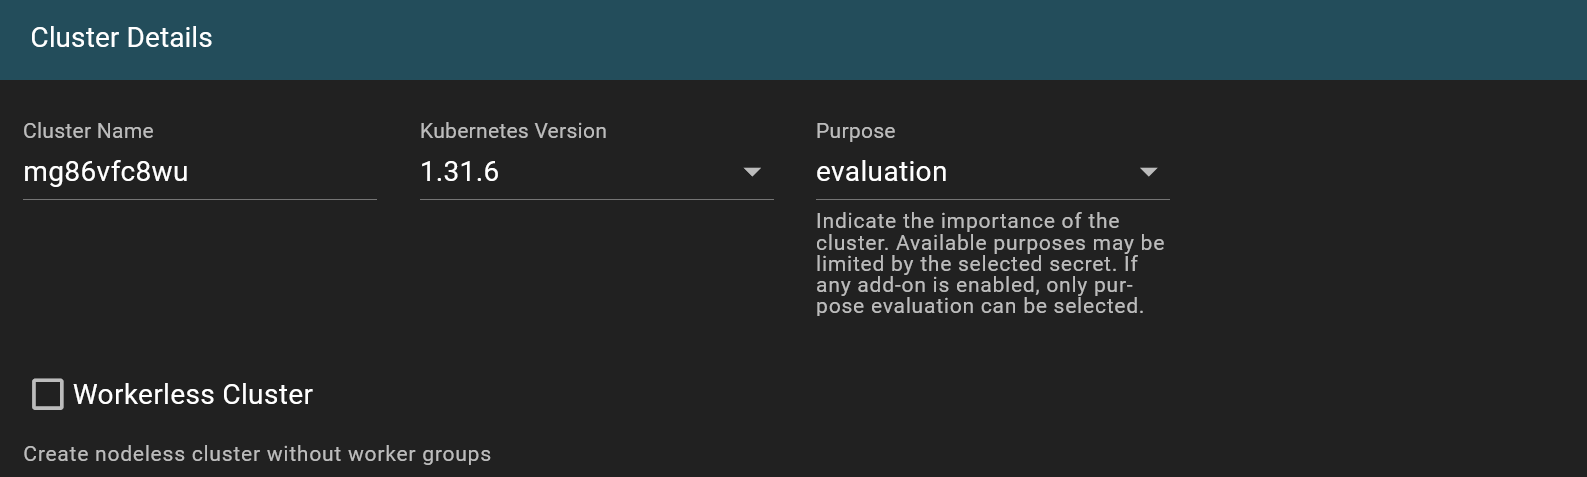
Cluster name: Gardener will generate a random default name for your cluster, or you can specify your own.
Kubernetes version: Clusters can be created with different Kubernetes versions. It is recommended to always use the latest supported version. Please note our policy on supported Kubernetes versions below.
Cluster purpose: This option indicates the intended use or production-readiness level of the cluster. For more information on the different configurations based on purpose, refer to shoot purposes.
Control Plane High Availability
Section titled “Control Plane High Availability”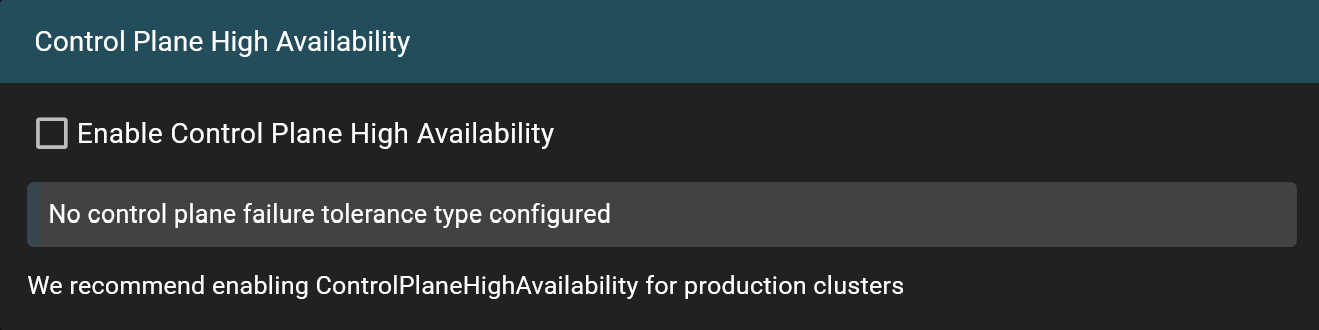
Gardener supports HA control planes. Enabling this feature sets up a three-instance etcd cluster, distributed over our datacenters within the same geolocation. If you need compliance with the SovereignCloudStack-compatible KaaS standard, this setting must be enabled. If disabled, a single-instance etcd cluster will be used instead.
DNS Configuration
Section titled “DNS Configuration”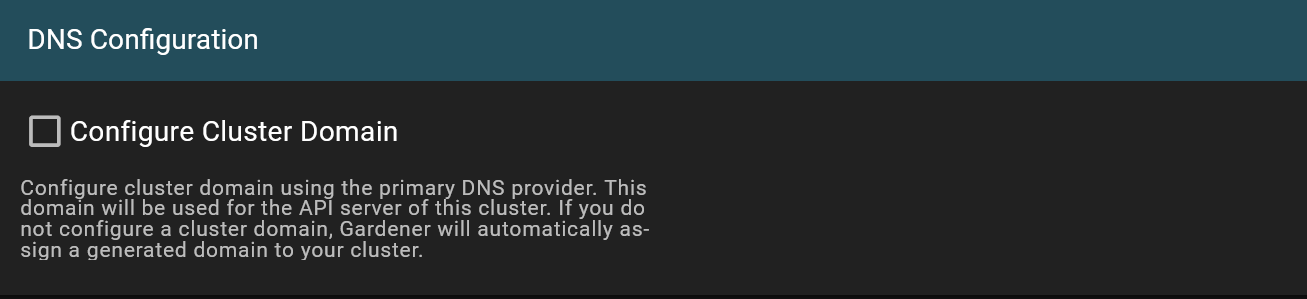
This is advanced configuration, explained in further detail below. Beginners can likely ignore this.
Worker
Section titled “Worker”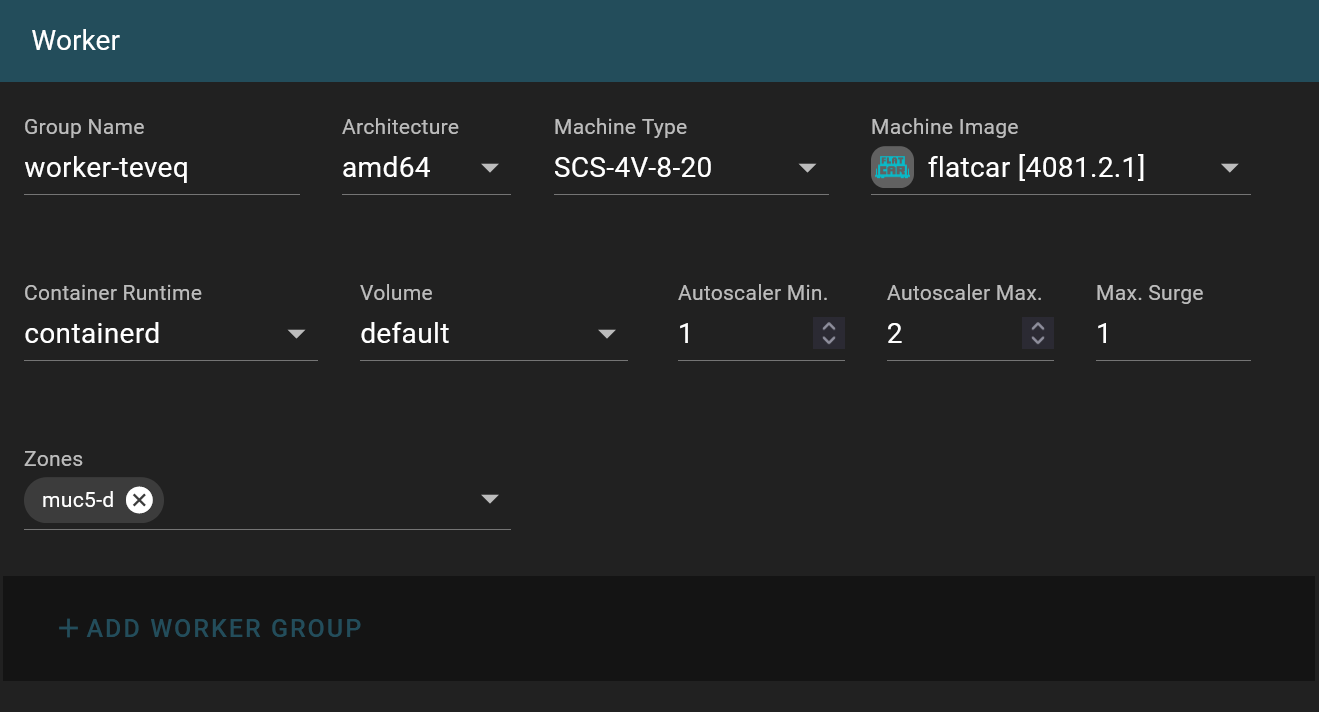
Group Name: Gardener will generate a random name for your worker group, or you can specify your own.
Machine Type: Choose the OpenStack flavor for your Kubernetes worker VMs. See the instance flavors overview for all available options, which can be freely selected there. Switching flavors after initial setup is supported; Gardener will subsequently replace the VMs.
Machine Image: Similar to Kubernetes version, this specifies the operating system image. It’s recommended to always use the latest supported version. Please note our policy on supported machine images below.
Volume Type: Choose the volume type for your worker VMs’ root volume. See Storage Types for an overview of available storage types including rbd_fast and LUKS.
Volume Size: Set the size of the root volume. We recommend 50 GB or more. Lower values may work as well, but can be insufficient for high log volume.
Autoscaling: Clusters with at least one worker group having minimum < maximum nodes will have an autoscaler deployment, allowing dynamic scaling of worker nodes based on demand. Consider increasing the node count to reduce the impact domain of a single node failure in your cluster.
Max. Surge: Clusters spread over multiple zones should configure this setting to be equal to or higher than the sum of all zones utilized, our usual recommendation is 3.
Zones: Similar to Control Plane High Availability above, you can distribute your workers across different data centers within the same geolocation. Keep in mind that PVCs reside in their respective availability zone and are not replicated between zones. If you require replicated storage, consider our S3 Storage.
Maintenance
Section titled “Maintenance”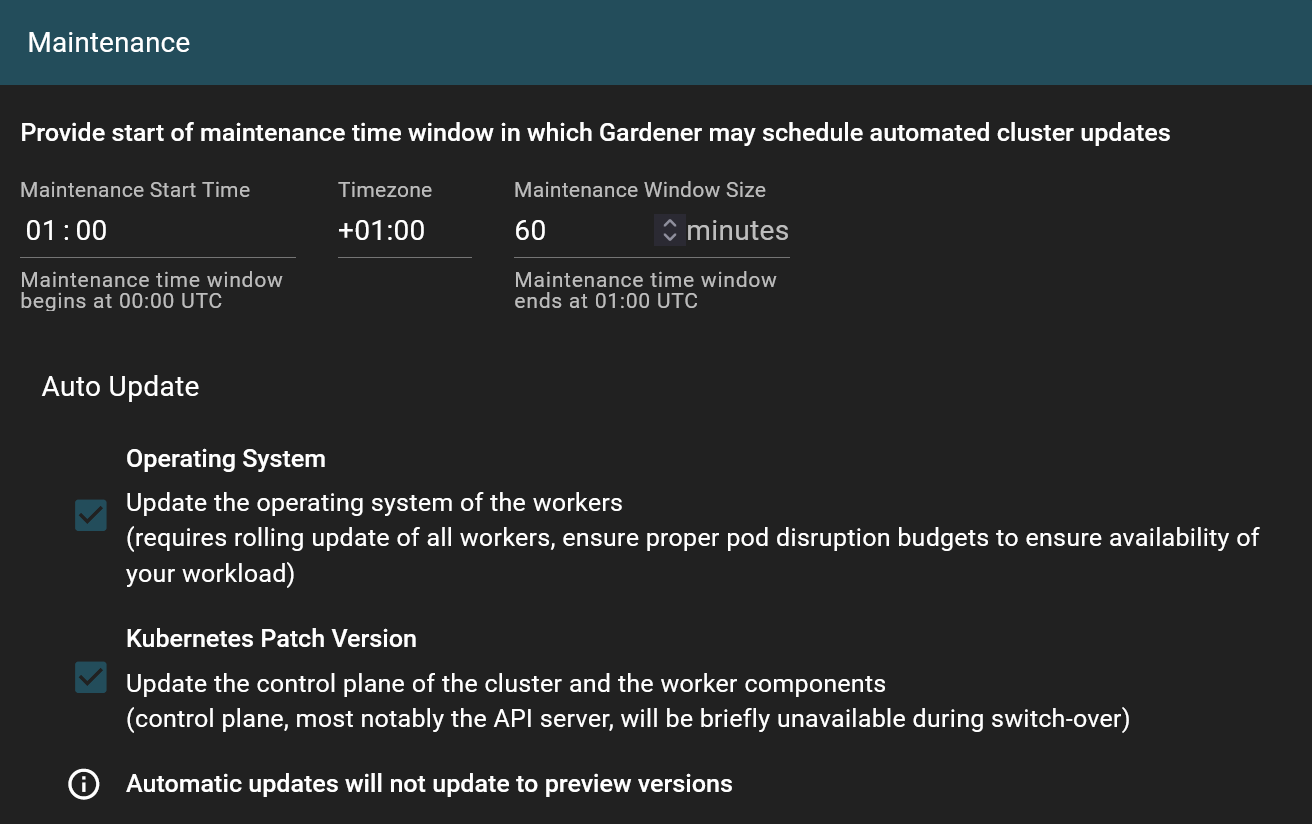
Gardener configures a maintenance window for automated cluster updates for:
- Kubernetes patch releases (major and minor upgrades must be triggered manually)
- Worker node OS images
The default value of this time frame may differ between cluster creations. Disabling this means the user is responsible for triggering updates manually, please note our policy on supported Kubernetes versions and supported machine images. For more details, refer to shoot maintenance in the Gardener documentation.
Hibernation
Section titled “Hibernation”If your cluster doesn’t need to run all the time, you can configure a hibernation schedule to automatically scale down your compute resources to zero. Please note that hibernation is subject to fair use and may be restricted at any time in the future.
Advanced Configuration - YAML
Section titled “Advanced Configuration - YAML”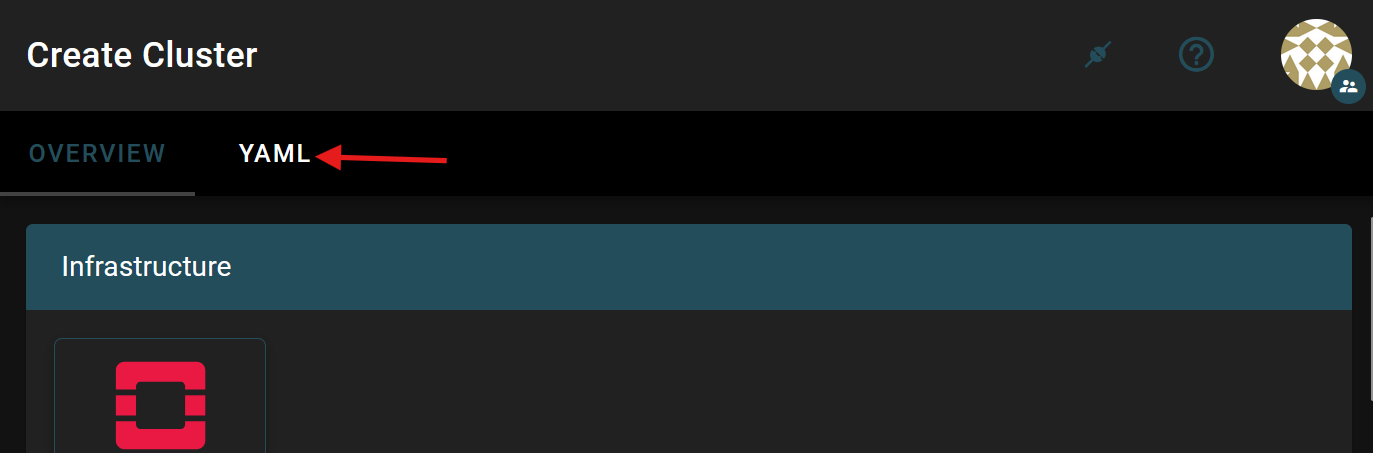
You can edit the generated Gardener custom resources directly by selecting the YAML tab. This allows you to specify settings not available in the configuration interface. Later parts of this guide will often ask you to add code snippets to your shoot’s declaration, this is what they are meant for.
The full range of options is showcased in the upstream example shoot config. OpenStack-specific settings are additionally described in the OpenStack provider documentation.
Network Sizing
Section titled “Network Sizing”The default network layout for shoot clusters is:
| Range | CIDR | Capacity |
|---|---|---|
| Nodes | 10.44.0.0/24 | 254 |
| Services | 10.98.0.0/18 | 16,384 |
| Pods | 10.194.0.0/18 | 16,384 |
To increase these limits, enlarge the networking ranges in the shoot declaration. Each node supports up to 110 pods and 256 volumes.
Do not use any of the following prefixes, as they are reserved for our infrastructure: 10.42.0.0/15, 10.96.0.0/15, 10.192.0.0/15.
Creating Clusters via API
Section titled “Creating Clusters via API”Clusters can alternatively be created via the Gardener API and kubectl, for example for automated pipelines or infrastructure-as-code. Installed kubectl is required.
Create a Service Account
Section titled “Create a Service Account”For a script or pipeline to be allowed to create clusters, you need a service account with sufficient permissions. You create this once in the Gardener web frontend.
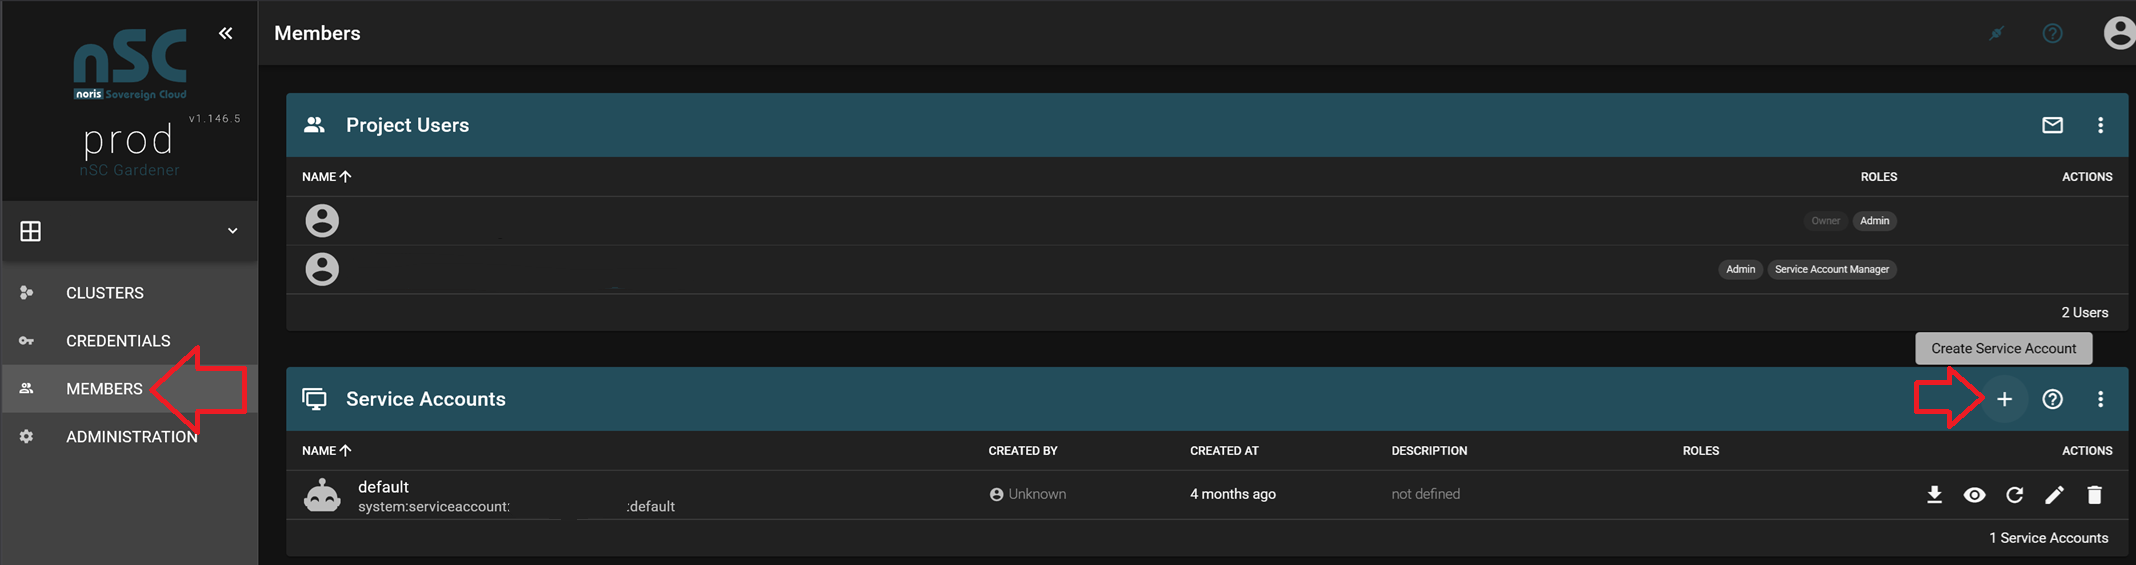
- Navigate to your project in the dashboard, then go to Members and click Create Service Account (see screenshot).
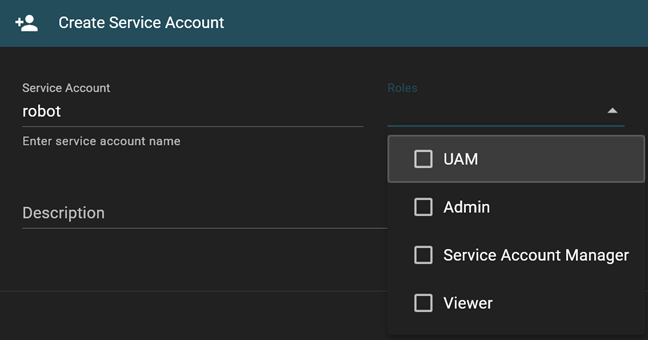
- Enter a name.
- Select a role. For creating shoots you need Admin, which grants full project-level control including the shoot lifecycle. The other roles have the following meaning:
- Service Account Manager: manages other service accounts, but cannot create shoots.
- Viewer: read-only access to the project.
- UAM: User Access Management, controls memberships.
- Click Create.
- Download the generated kubeconfig file.
Create a Shoot with kubectl
Section titled “Create a Shoot with kubectl”Point the KUBECONFIG environment variable to the downloaded file:
export KUBECONFIG=./kubeconfig-garden-<project-id>.yamlThe service account is already scoped to the correct namespace of your project. You can verify this:
kubectl get shootsNo resources found in garden-<project-id> namespace.The following declaration shows an example shoot manifest for a cluster on nSC OpenStack:
kind: ShootapiVersion: core.gardener.cloud/v1beta1metadata: name: demospec: provider: type: openstack infrastructureConfig: apiVersion: openstack.provider.extensions.gardener.cloud/v1alpha1 kind: InfrastructureConfig networks: workers: 10.44.0.0/24 floatingPoolName: external controlPlaneConfig: apiVersion: openstack.provider.extensions.gardener.cloud/v1alpha1 kind: ControlPlaneConfig loadBalancerProvider: ovn workers: - name: cpu-worker minimum: 1 maximum: 3 maxSurge: 1 machine: type: SCS-1V-4 image: name: flatcar # version: 4593.2.4 architecture: amd64 zones: - nbg3 - nbg1 - nbg6 cri: name: containerd volume: type: rbd_fast size: 50Gi networking: nodes: 10.44.0.0/24 type: cilium # kubernetes: # version: 1.35.7 cloudProfile: name: openstack kind: CloudProfile credentialsBindingName: default-openstack-secret purpose: evaluation region: nsc-nbg maintenance: autoUpdate: kubernetesVersion: true machineImageVersion: true timeWindow: begin: 030000+0200 end: 040000+0200 controlPlane: highAvailability: failureTolerance: type: zoneAs shown in the example, sensible defaults apply when values are not set. Adjust the following values for your project:
- Cluster name (
demo) and worker group name (cpu-worker): freely chosen. - Flavor (
SCS-1V-4): see instance flavors. - Machine image (
flatcar): see supported machine images. - Volume type (
rbd_fast): see storage types. - Kubernetes version (
1.35.7): see supported Kubernetes versions. - Region (
nsc-nbg) and availability zones (nbg3,nbg1,nbg6). - Network CIDRs: can be customized, but cannot be changed retrospectively, see Network Sizing.
- Cluster purpose (
evaluation): see shoot purposes. - Highly available control plane (
failureTolerance.type: zone): see Control Plane High Availability.
Apply the declaration:
kubectl apply -f shoot.yamlAfter creation, Gardener provisions the cluster. Monitor progress with:
kubectl get shoot demo -wOnce the status changes to Succeeded, the cluster is ready. You can retrieve the shoot kubeconfig directly via the API:
kubectl get secret demo.kubeconfig \ -o jsonpath='{.data.kubeconfig}' | base64 -d > shoot-kubeconfig.yamlPoint KUBECONFIG to this file and verify connectivity:
export KUBECONFIG=./shoot-kubeconfig.yamlkubectl get nodesAccess a Cluster
Section titled “Access a Cluster”To follow this guide, you need to have the following CLI tools installed:
We recommend always using the latest versions of these tools.
Once the cluster has finished bootstrapping, you can set up kubectl access. Gardener supports secure authentication via OIDC with gardenlogin and kubelogin. gardenctl can serve as a replacement for gardenlogin; for the sake of simplicity, this guide only explains gardenlogin.
Configure gardenlogin
Section titled “Configure gardenlogin”Create the config file ~/.garden/gardenctl-v2.yaml with the following content:
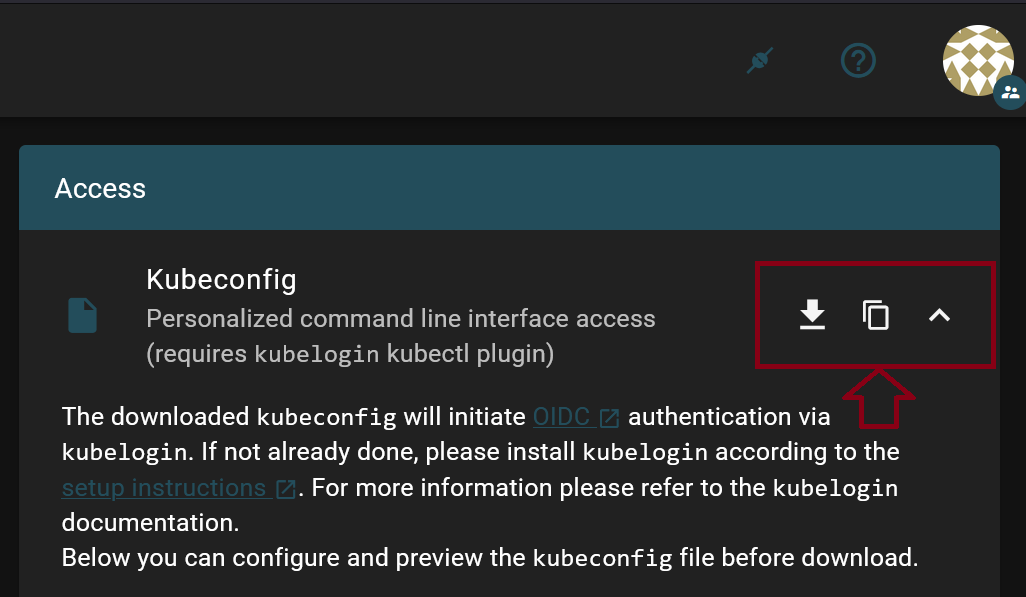
gardens: - identity: garden01-prod-nsc02 kubeconfig: ~/.garden/kubeconfig-garden.yamlThis kubeconfig referenced in gardenctl-v2.yaml can be configured and downloaded here: dashboard.ingress.garden-runtime.k8s.nsc02.noris.cloud/account
Use kubectl
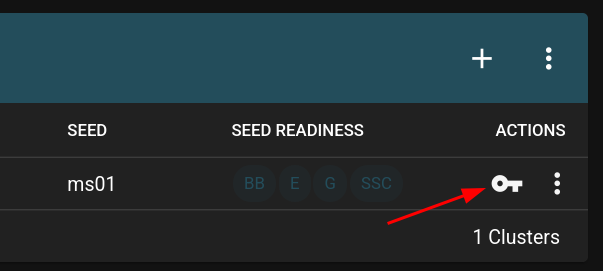
Section titled “Use kubectl”You can download the appropriate kubeconfigs for your clusters from the cluster overview by clicking on the key symbol.
Download the Kubeconfig - Gardenlogin file.
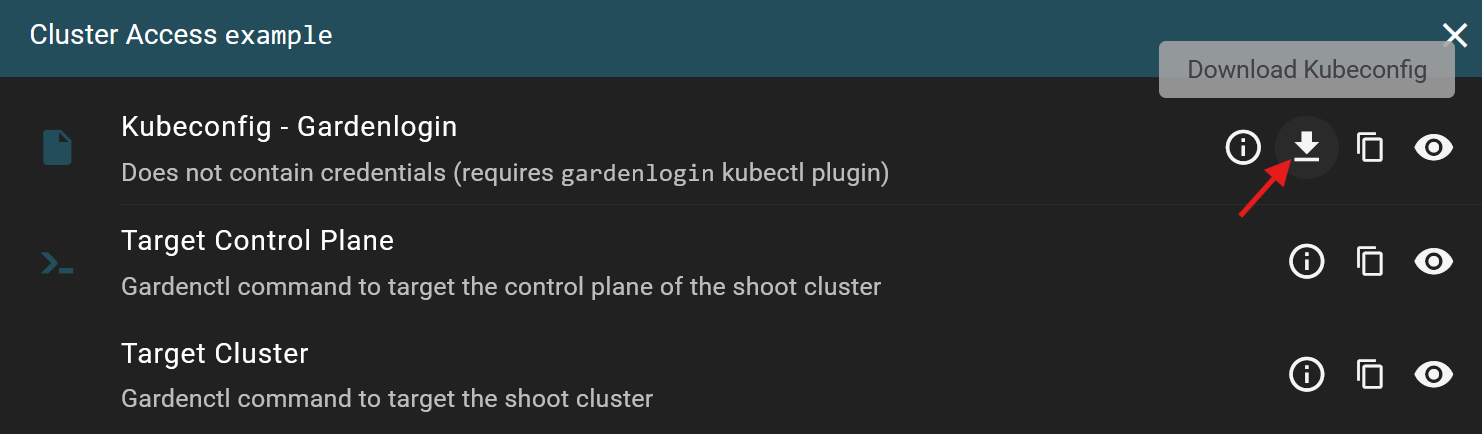
Save it in the ~/.kube/ directory. If you are managing only a single cluster, you can rename the file to ~/.kube/config. Otherwise, while there are multiple options to configure kubectl, one option is to point the KUBECONFIG environment variable to a specific file:
❯ export KUBECONFIG=~/.kube/kubeconfig-gardenlogin--<project_id>--<cluster_name>.yamlAfter successful installation of the required tools, you should be able to find the following binaries in your PATH by running compgen -c | grep kubectl:
❯ compgen -c | grep kubectlkubectl-oidc_loginkubectl-gardenloginkubectlAdditionally, these files were created in this guide:
~/.garden/gardenctl-v2.yaml~/.garden/kubeconfig-garden.yaml~/.kube/config(or the name you chose)
You can now access your first cluster:
❯ kubectl get nodesNAMEshoot--example--example-worker-r6tfb-z1-76469-ttt8gshoot--example--example-worker-r6tfb-z1-76469-xb9dvSecond Day Operations
Section titled “Second Day Operations”Lifecycle Management
Section titled “Lifecycle Management”Kubernetes
Section titled “Kubernetes”Our supported versions can be easily identified by the “supported” flag during cluster creation. We strive to closely follow the guidelines of the upstream Kubernetes project. Our goal is to support the latest patch release of the three most recent Kubernetes minor versions. The latest minor version may initially be available only as a preview while we work on adding full support, we do not provide SLAs for preview releases.
All releases except the latest receive an expiration date. Deprecated patch releases are flagged as deprecated. If you configured automatic Kubernetes upgrades, your shoot clusters will be upgraded to the latest patch release in the next maintenance window.
On reaching said expiration date, shoot clusters using a deprecated Kubernetes version will be force-upgraded to a supported minor release regardless of the automatic update configuration. Upstream Kubernetes actively deprecates and removes legacy functions, it is recommended to test upgrades preemptively and to keep up with the upstream release notes and deprecation notices.
Flatcar
Section titled “Flatcar”Our supported version is easily identifiable by the “supported” flag during cluster creation. We aim to support the latest Flatcar stable release and keep the latest 3 images available for installation. The latest minor version may initially be available only as a preview while we work on adding full support, we do not provide SLAs for preview releases.
Older releases are flagged as deprecated, with an expiration date attached. If you configured automatic OS upgrades, Flatcar worker nodes running deprecated releases will be upgraded to the latest minor release in the next maintenance window.
On reaching said expiration date, worker nodes using deprecated Flatcar OS images will be force-upgraded to a supported version regardless of the automatic update configuration. While the impact of OS image upgrades on container workloads is fairly rare, we advise keeping track of upstream changes and testing upgrades preemptively.
Storage Options
Section titled “Storage Options”See OpenStack for storage option documentation.
Control Plane Logs
Section titled “Control Plane Logs”Control Plane logs can be easily accessed through the web interface:
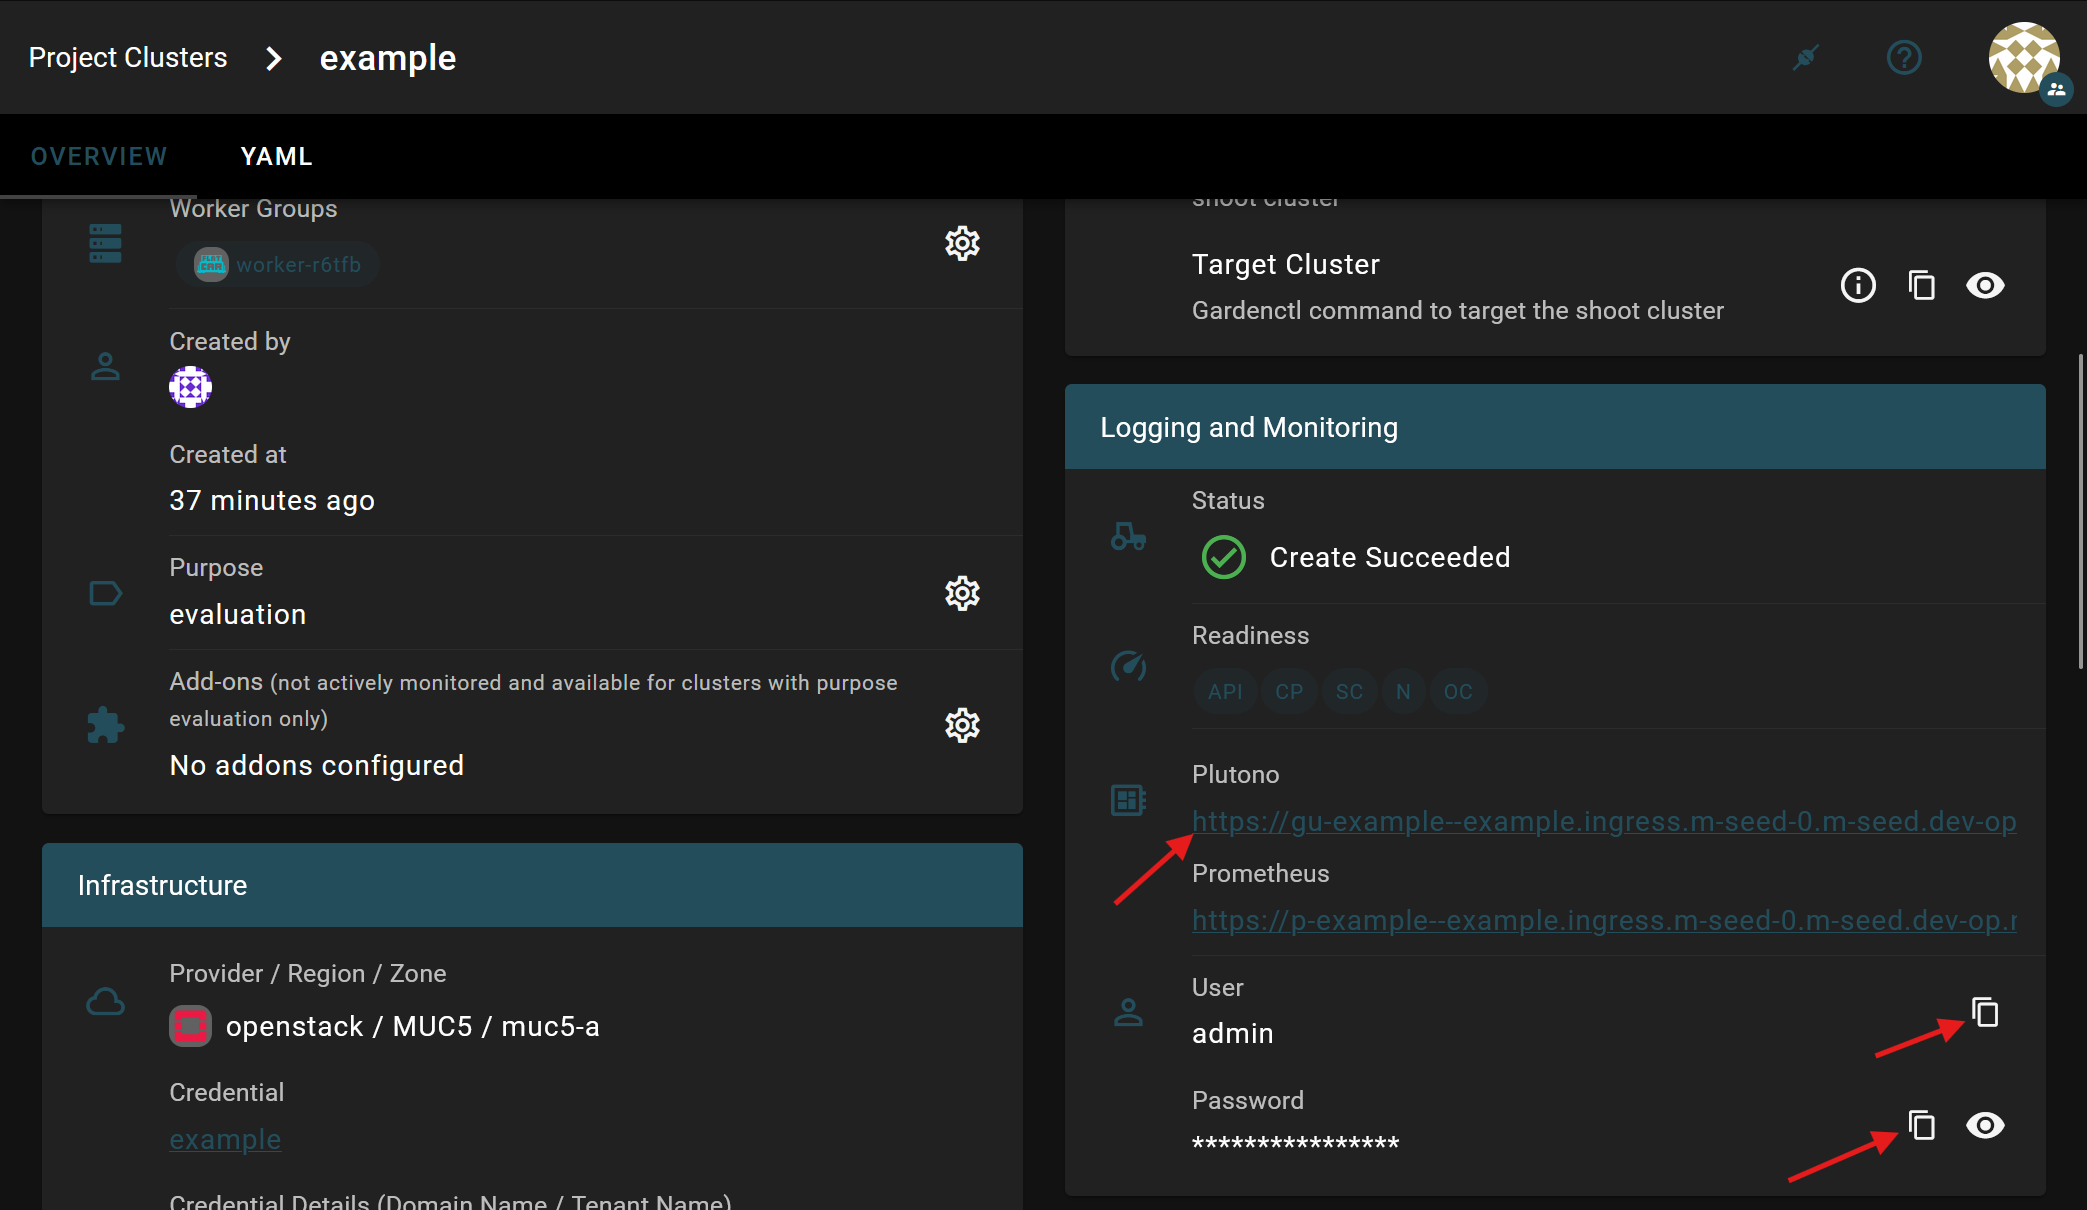
Search for "log":
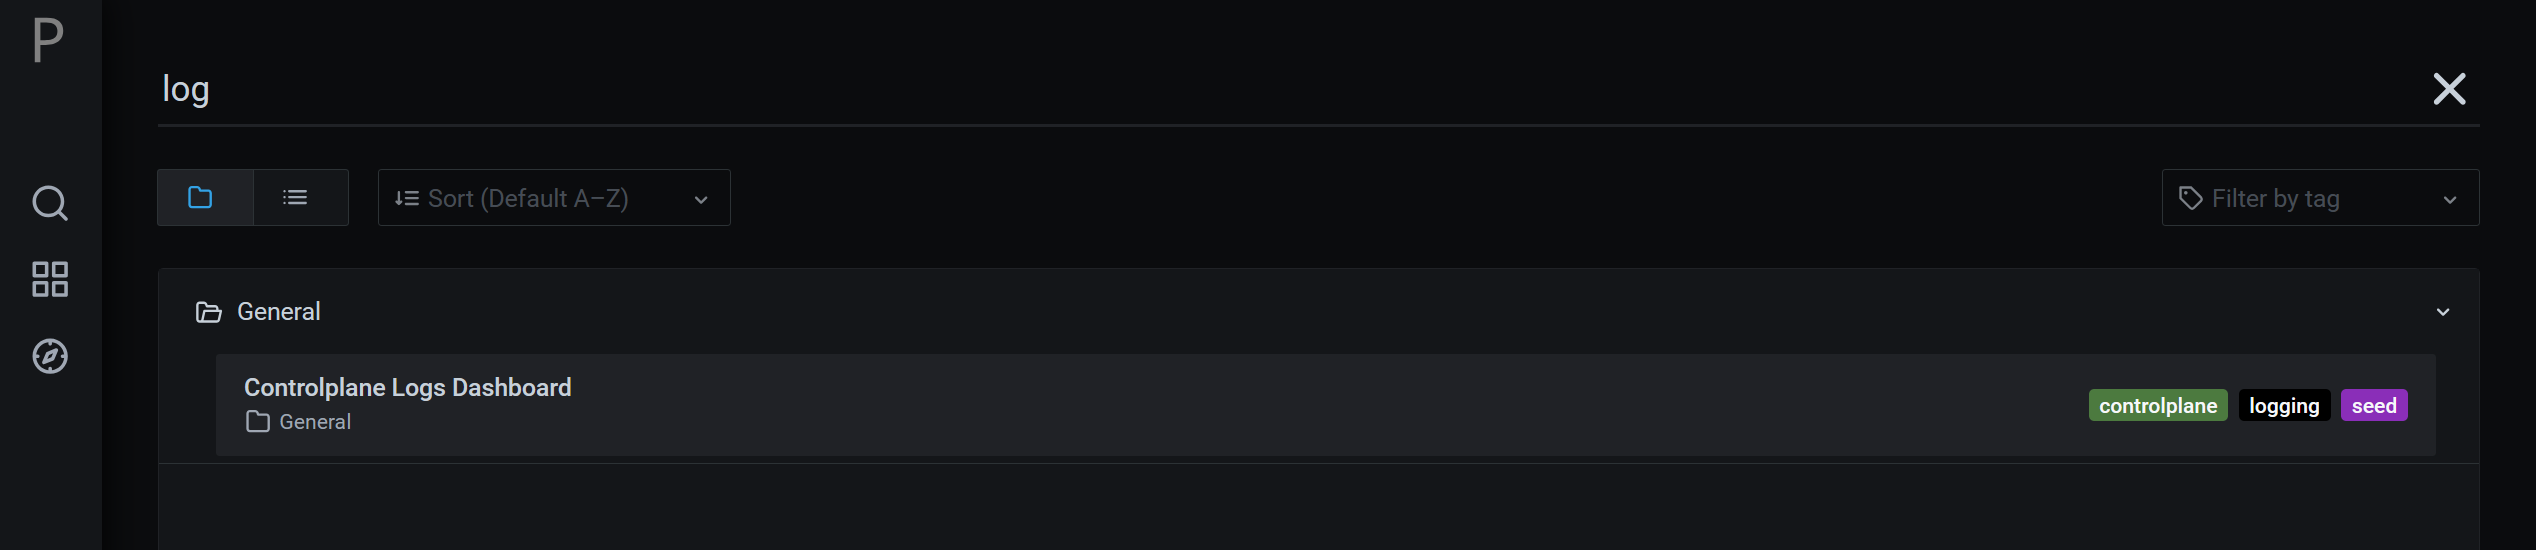
This tool contains logs of your control plane, e.g. etcd, MachineControllerManager, CSI driver, and cluster-autoscaler. Logs of your own pods running on worker nodes are not preserved there.
Gardener also operates embedded Prometheus and Grafana instances for control plane metrics, accessible via the Gardener dashboard. Further details can be found in the Gardener monitoring documentation.
Network Observability
Section titled “Network Observability”Our default CNI, Cilium, offers a free open-source network observability feature called Hubble:
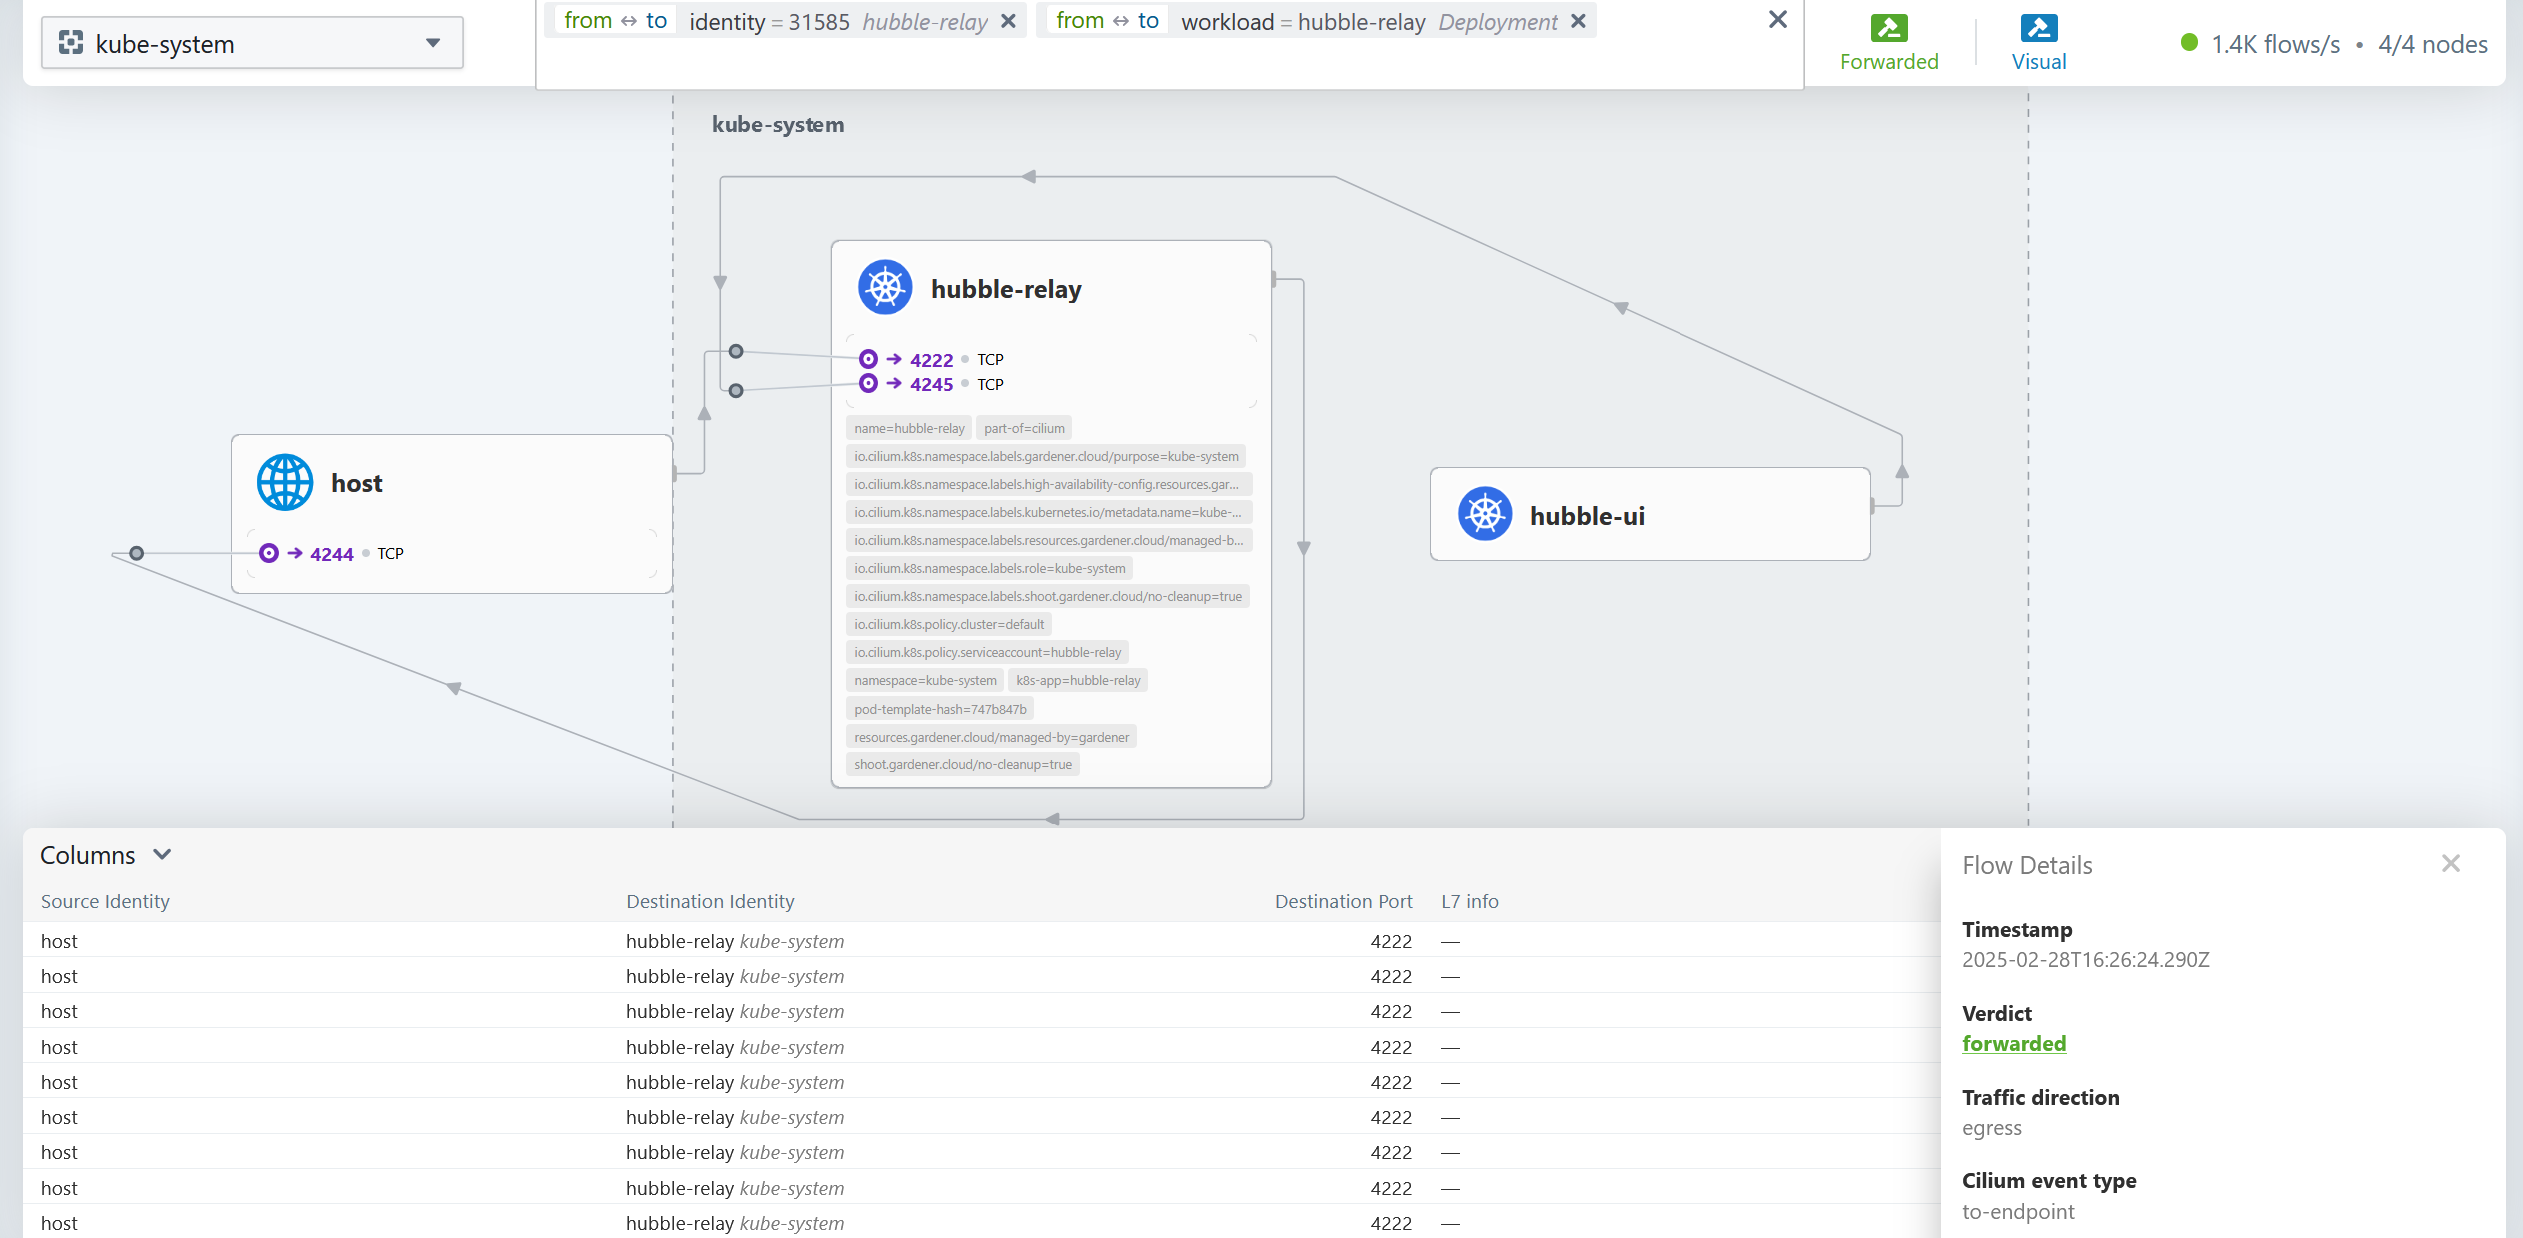
To utilize it, add the following to your shoot declaration:
apiVersion: core.gardener.cloud/v1beta1kind: Shoot...spec: networking: type: cilium providerConfig: overlay: enabled: true hubble: enabled: trueAfterwards, running the following code will allow you to access a web frontend of your network flows on your local machine. The Cilium binary is available from the Cilium CLI releases.
❯ cilium hubble uiℹ️ Opening "http://localhost:12000" in your browser...Network - Node to Node Encryption
Section titled “Network - Node to Node Encryption”To enable node-to-node encryption in Cilium using WireGuard (see Cilium transparent encryption docs), declare the encryption in your shoot manifest:
apiVersion: core.gardener.cloud/v1beta1kind: Shoot...spec: networking: type: cilium providerConfig: apiVersion: cilium.networking.extensions.gardener.cloud/v1alpha1 kind: NetworkConfig encryption: enabled: true mode: wireguardOpenStack Server Groups
Section titled “OpenStack Server Groups”Gardener allows the user to create a server group via the following shoot declaration add-ins. These make the underlying OpenStack aware of the cluster and can be useful to spread the workload over multiple hardware nodes.
apiVersion: core.gardener.cloud/v1beta1kind: Shoot...spec: provider: type: openstack workers: - ... providerConfig: apiVersion: openstack.provider.extensions.gardener.cloud/v1alpha1 kind: WorkerConfig serverGroup: policy: soft-anti-affinityRegistry Cache
Section titled “Registry Cache”Our CRI, containerd, supports the use of registry mirrors. This feature is helpful for bypassing registry rate limits (e.g. hub.docker.com) and integrating a centralized container security scanner. Example:
apiVersion: core.gardener.cloud/v1beta1kind: Shoot...spec: extensions: - type: registry-mirror providerConfig: apiVersion: mirror.extensions.gardener.cloud/v1alpha1 kind: MirrorConfig mirrors: - upstream: docker.io hosts: - host: "https://mirror.gcr.io" capabilities: ["pull"]Per default, our openstack-designate creates a subdomain for your cluster:
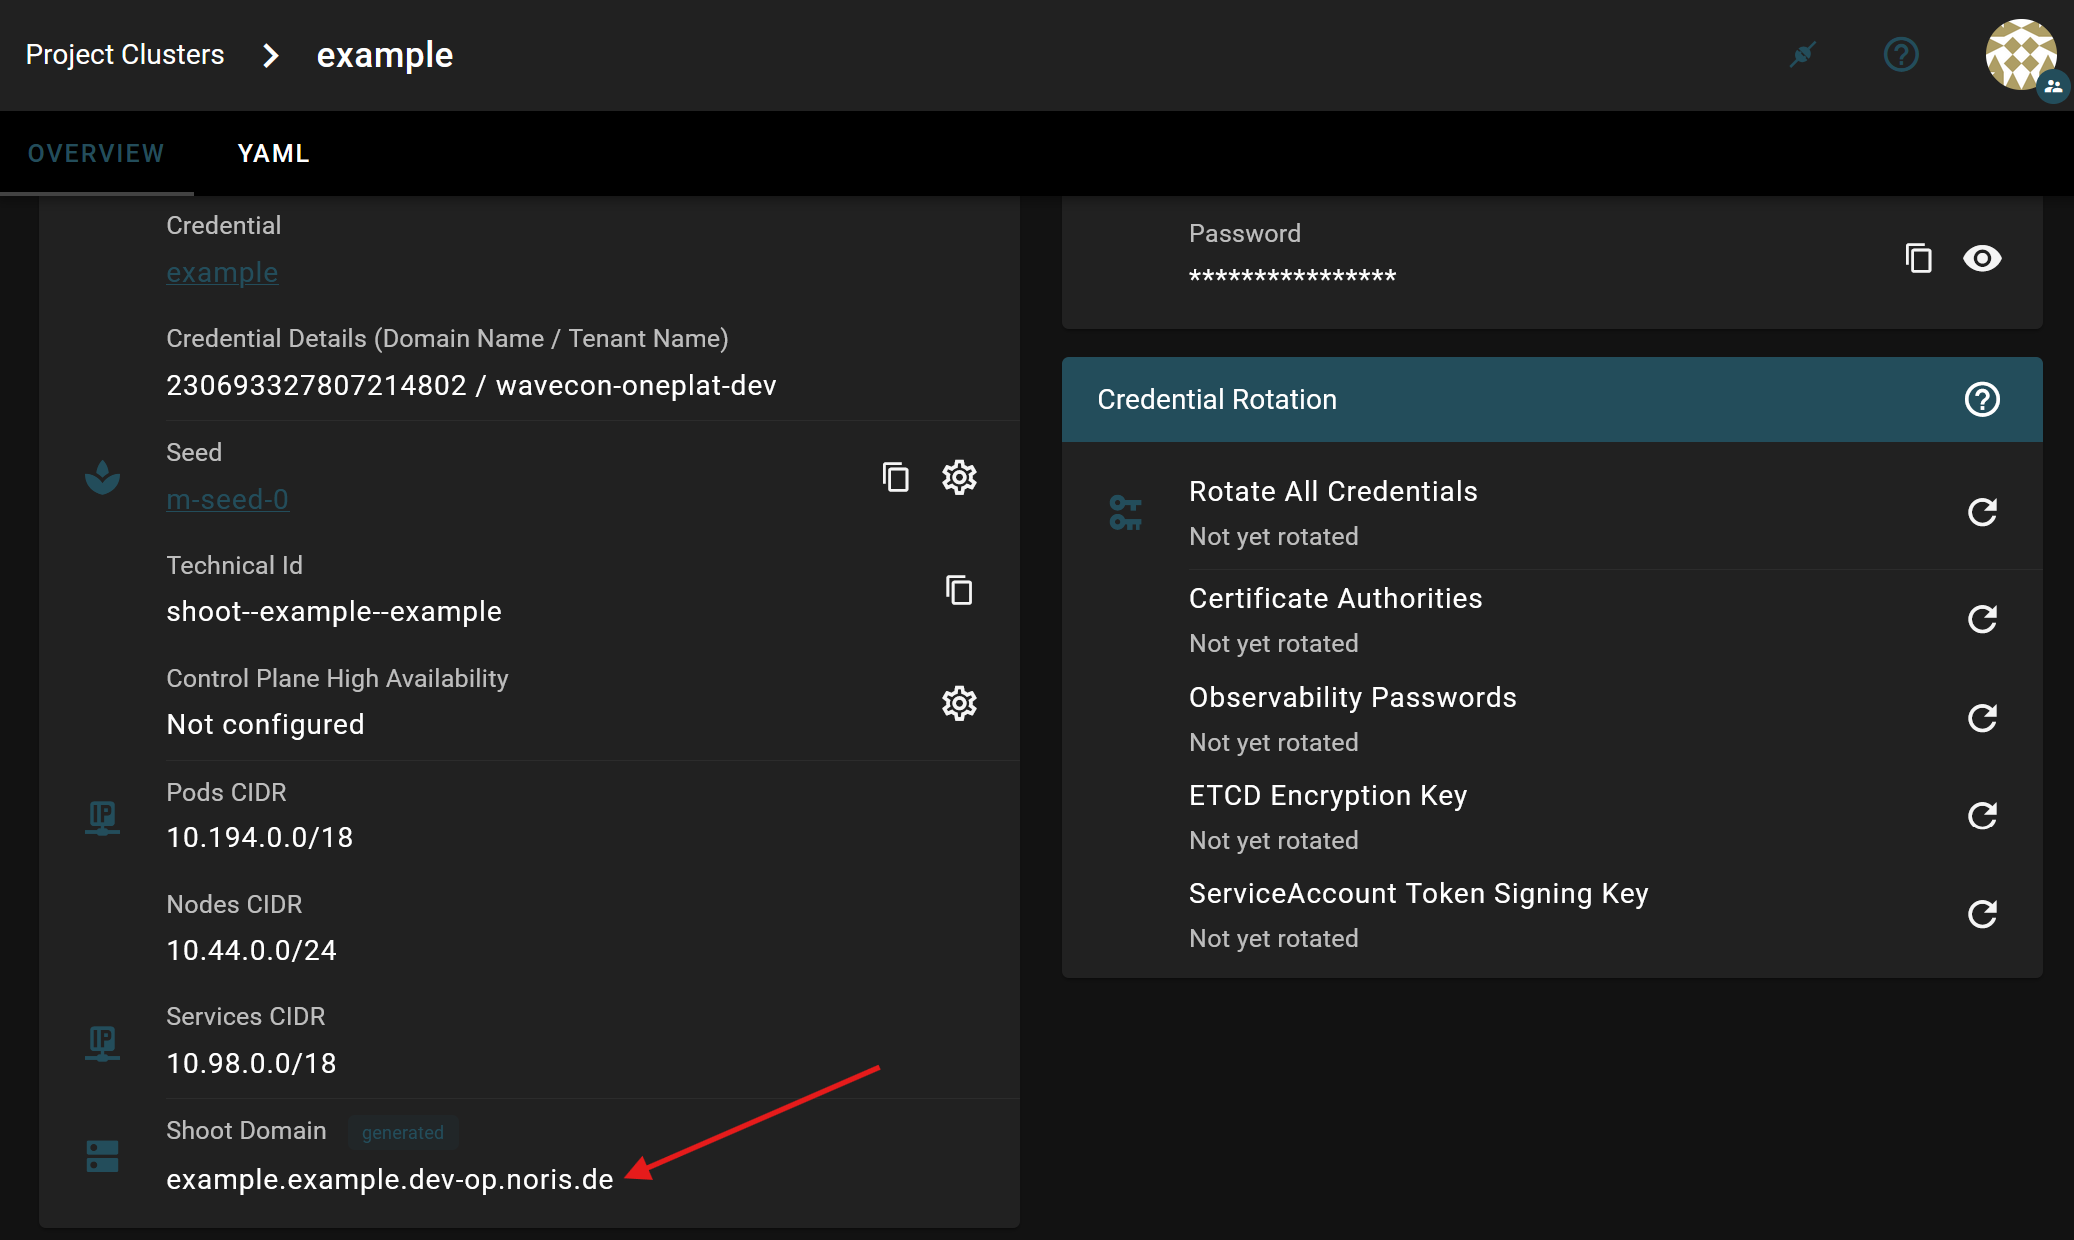
Gardener has built-in helpers for comfortably managing DNS entries:
apiVersion: core.gardener.cloud/v1beta1kind: Shoot...spec: extensions: - type: shoot-dns-serviceAfterwards, add the following annotations to your ingress declarations:
apiVersion: networking.k8s.io/v1kind: Ingressmetadata: name: registry annotations: # Let Gardener manage external DNS records for this Ingress. dns.gardener.cloud/dnsnames: "*" # Use "*" to collect domain names from .spec.rules[].host dns.gardener.cloud/ttl: "60" dns.gardener.cloud/class: gardenIn case your use case should be even more advanced, be sure to check out the complete upstream documentation.
Utilize your own subdomain
Section titled “Utilize your own subdomain”Using your own subdomain can be achieved in different ways:
a) If you want to federate a subdomain of your own domain to our OpenStack DNS service “Designate”, please open a support ticket.
b) Alternatively, Gardener can manage DNS records using the following external DNS providers. Please note that we can’t offer any SLAs for external DNS servers:
- openstack-designate
- aws-route53
- azure-dns
- azure-private-dns
- google-clouddns
- alicloud-dns
- infoblox-dns
- netlify-dns
- rfc2136
You can add the access secrets for your external DNS provider under “Secrets” in the Gardener UI.

Certificates
Section titled “Certificates”Gardener has built-in helpers for comfortably requesting free certificates via DNS-based Let’s Encrypt challenges. This example also includes creating the respective entries, given that certificate creation requires respective DNS entries to exist:
apiVersion: core.gardener.cloud/v1beta1kind: Shoot...spec: extensions: - type: shoot-cert-service providerConfig: apiVersion: service.cert.extensions.gardener.cloud/v1alpha1 kind: CertConfig issuers: - email: example@yourdomain.de name: custom-issuer # issuer name must be specified in every custom issuer request, must not be "garden" server: 'https://acme-staging-v02.api.letsencrypt.org/directory' # please test with staging first, then switch to prod letsencrypt - type: shoot-dns-serviceAfterwards, add the following annotations to your ingress declarations:
apiVersion: networking.k8s.io/v1kind: Ingressmetadata: name: registry annotations: # Let Gardener manage external DNS records for this Ingress. dns.gardener.cloud/dnsnames: "*" # Use "*" to collect domain names from .spec.rules[].host dns.gardener.cloud/ttl: "60" dns.gardener.cloud/class: garden # Let Gardener manage Certificates. cert.gardener.cloud/purpose: managed cert.gardener.cloud/issuer: custom-issuer cert.gardener.cloud/commonName: "*.ingress.<yourClusterDomain>" cert.gardener.cloud/dnsrecord-class: garden # optional, only required on Garden runtime cluster...For advanced use cases, check out the complete upstream documentation, for example using service type LoadBalancer or requesting a certificate as a secret.
Istio Service Mesh
Section titled “Istio Service Mesh”The certificate and DNS extensions are also useful for installing an Istio Service Mesh.
Loadbalancer
Section titled “Loadbalancer”Creating service objects of type LoadBalancer will create a load balancer in OpenStack and use it for your service. A common problem is that the associated floating IP address might change when deleting and reapplying a service. To prevent this, a floating IP address must be acquired manually in OpenStack and specified when creating the service:
apiVersion: 'v1'kind: 'Service'metadata: annotations: loadbalancer.openstack.org/keep-floatingip: "true" loadbalancer.openstack.org/load-balancer-address: <floatingip>spec: type: 'LoadBalancer' loadBalancerIP: <floatingip>For ingress resources, this has to be set for the service of the ingress controller.
Data Backup and Recovery
Section titled “Data Backup and Recovery”Please note that nSC does not back up customer-created content. It is the customer’s responsibility to back up their data, for example metadata (services, ingresses, pods, etc. declarations), the content of PVs (e.g. postgre-01), and the content of S3 buckets. Velero is a popular open-source tool that can assist with this task.
Security - Disabling SSH Access
Section titled “Security - Disabling SSH Access”SSH access can be disabled by specifying the following setting in the shoot declaration:
apiVersion: core.gardener.cloud/v1beta1kind: Shoot...spec: provider: workersSettings: sshAccess: enabled: falseSecurity - etcd Encryption
Section titled “Security - etcd Encryption”nSC backs up the shoot’s etcd on a regular basis. This backup is used for migrations of control planes between seeds and automated etcd recovery. Please note this is done on a best-effort basis, and the final responsibility for user data backup lies with the customer.
Shoot declarations can specify which etcd fields need to be encrypted. Secrets are always encrypted:
apiVersion: core.gardener.cloud/v1beta1kind: Shoot...spec: kubernetes: kubeAPIServer: encryptionConfig: resources: - configmapsDetails are available in the Gardener documentation on etcd encryption.
Security - Seccomp Profile RuntimeDefault
Section titled “Security - Seccomp Profile RuntimeDefault”Gardener allows users to change the default seccompProfile from the unrestricted Unconfined to the more restricted RuntimeDefault by specifying the following in your shoot declaration:
apiVersion: core.gardener.cloud/v1beta1kind: Shoot...spec: kubernetes: kubelet: seccompDefault: trueDetails are available in the Gardener documentation on the seccomp profile.
Security - PodSecurity Admission Plugins
Section titled “Security - PodSecurity Admission Plugins”Gardener allows users to configure their PodSecurity admission defaults in the shoot declaration. These are used if mode labels are not set by an application:
apiVersion: core.gardener.cloud/v1beta1kind: Shoot...spec: kubernetes: kubeAPIServer: admissionPlugins: - name: PodSecurity config: apiVersion: pod-security.admission.config.k8s.io/v1 kind: PodSecurityConfiguration # Level label values must be one of: # - "privileged" (default) # - "baseline" # - "restricted" defaults: enforce: "baseline" audit: "baseline" warn: "baseline" exemptions: # Array of authenticated usernames to exempt. usernames: [] # Array of runtime class names to exempt. runtimeClasses: [] # Array of namespaces to exempt. namespaces: []Details are available in the Gardener documentation on pod security.
Add Structured Authentication to your Shoot
Section titled “Add Structured Authentication to your Shoot”Users authenticated in Gardener are given full admin permissions within your shoot cluster. This part of the guide describes a working example of how you could implement OIDC and RBAC to separate additional, less-privileged users into groups. For more detailed information, read the Gardener docs.
If you don’t already have an OIDC provider, you can follow our IAM guide’s OIDC Authentication section to configure Zitadel accordingly.
Adapt a ConfigMap describing your structured authentication:
apiVersion: v1kind: ConfigMapmetadata: name: name-of-configmap-containing-authentication-config namespace: garden-5mc4xk5nxpdata: config.yaml: | apiVersion: apiserver.config.k8s.io/v1beta1 kind: AuthenticationConfiguration jwt: - issuer: url: 'https://id.nbg.nsc.noris.cloud' audiences: - "1234567890987654321" audienceMatchPolicy: MatchAny claimMappings: username: claim: preferred_username prefix: ws# groups: claim: roles prefix: ws# uid: claim: subTo apply your ConfigMap to your project: kubectl -n garden-<your-project> --kubeconfig ~/.garden/kubeconfig-garden.yaml apply <your-configmap.yaml>
You can adjust the name for your ConfigMap and should adjust namespace to the Kubernetes namespace of your project’s virtual garden. Adjust issuer.url to the URL of your OIDC issuer (if you are using our Zitadel, the “issuer” key is found under your IDP’s OIDC configuration endpoint: id.nbg.nsc.noris.cloud/.well-known/openid-configuration). Also configure the OIDC ClientId under audiences to fit your OIDC provider.
Prefixes for username and groups can be set to your own choosing, but you need to keep them in mind when setting RoleBindings/ClusterRoleBindings.
During shoot creation you can now reference the newly created ConfigMap. Click on the ”+” sign to create a new shoot.

Click on “YAML” to switch to the advanced view.
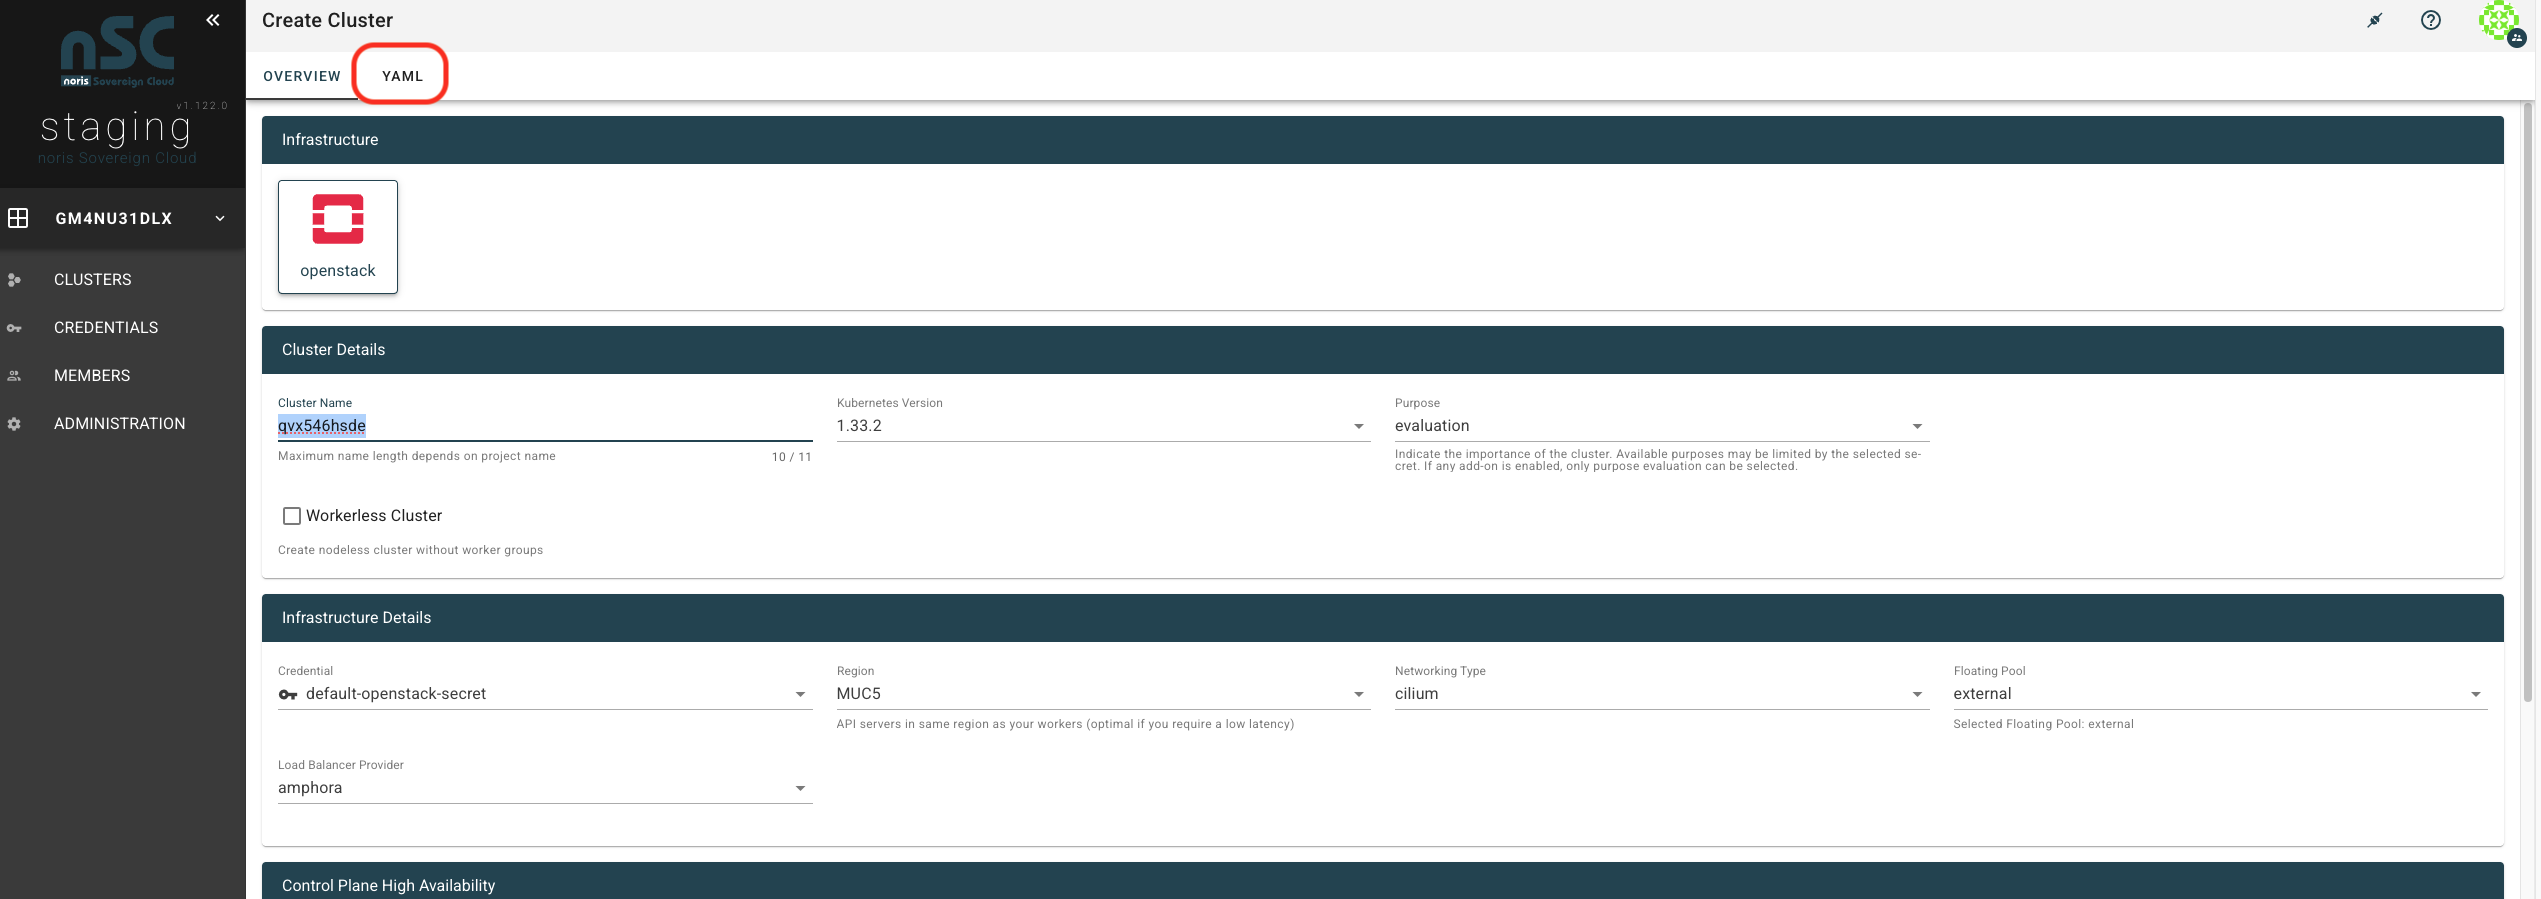
Adjust the Shoot configuration to your liking and add the following object:
apiVersion: core.gardener.cloud/v1beta1kind: Shoot...spec: kubernetes: kubeAPIServer: structuredAuthentication: configMapName: name-of-configmap-containing-authentication-config...The name of the config map should be the same as the name you chose when adjusting the config map.
Add ClusterRoleBinding/RoleBinding to your Shoot
Section titled “Add ClusterRoleBinding/RoleBinding to your Shoot”Add the RoleBinding/ClusterRoleBinding according to your RBAC model. In our example, someone who has the cluster-admin role provided by Zitadel in their ID token will gain the cluster-admin role in Kubernetes by setting the following ClusterRoleBinding in your Shoot:
---apiVersion: rbac.authorization.k8s.io/v1kind: ClusterRoleBindingmetadata: name: some-name-for-my-oidc-admin-clusterrolebindingroleRef: apiGroup: rbac.authorization.k8s.io kind: ClusterRole name: cluster-adminsubjects: - apiGroup: rbac.authorization.k8s.io kind: Group name: ws#cluster-adminTo apply your ClusterRoleBinding to your project: kubectl -n garden-<your-project> --kubeconfig ~/.garden/kubeconfig-garden.yaml apply <your-ClusterRolebinding.yaml>
API Documentation
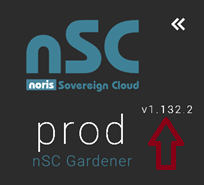
Section titled “API Documentation”The authoritative source is the official Gardener API reference. Switching to the git branch that matches the current Gardener version, as shown in the screenshot, is advised:
To easily inspect the API elements, kubectl also implements a very nice shortcut via these commands, for example:
kubectl api-resourceskubectl explain pods --recursiveSecurity Announcements / CVEs
Section titled “Security Announcements / CVEs”Please check out these notification channels if you want to stay informed about the latest Gardener security notifications.
Extensions
Section titled “Extensions”The Gardener platform can be extended with the following additional extensions. If you’d like us to add this functionality, please request a quote.
- auditing: forward audit logs to SIEM backends
- diki: compliance scanner for STIG and security hardening rulesets
- shoot-falco-service: runtime security monitoring
- shoot-lakom-service: Cosign image signature verification, supply-chain security
- shoot-rsyslog-relp: syslog forwarding to central log sinks
- registry-cache: pull-through cache reduces registry traffic and dependencies
- shoot-networking-filter: egress filtering, data-exfiltration control
- image-rewriter: rewrites image references to registry mirrors
- shoot-traefik: ingress controller
- envoy-gateway: Gateway API controller
Deleting a Cluster
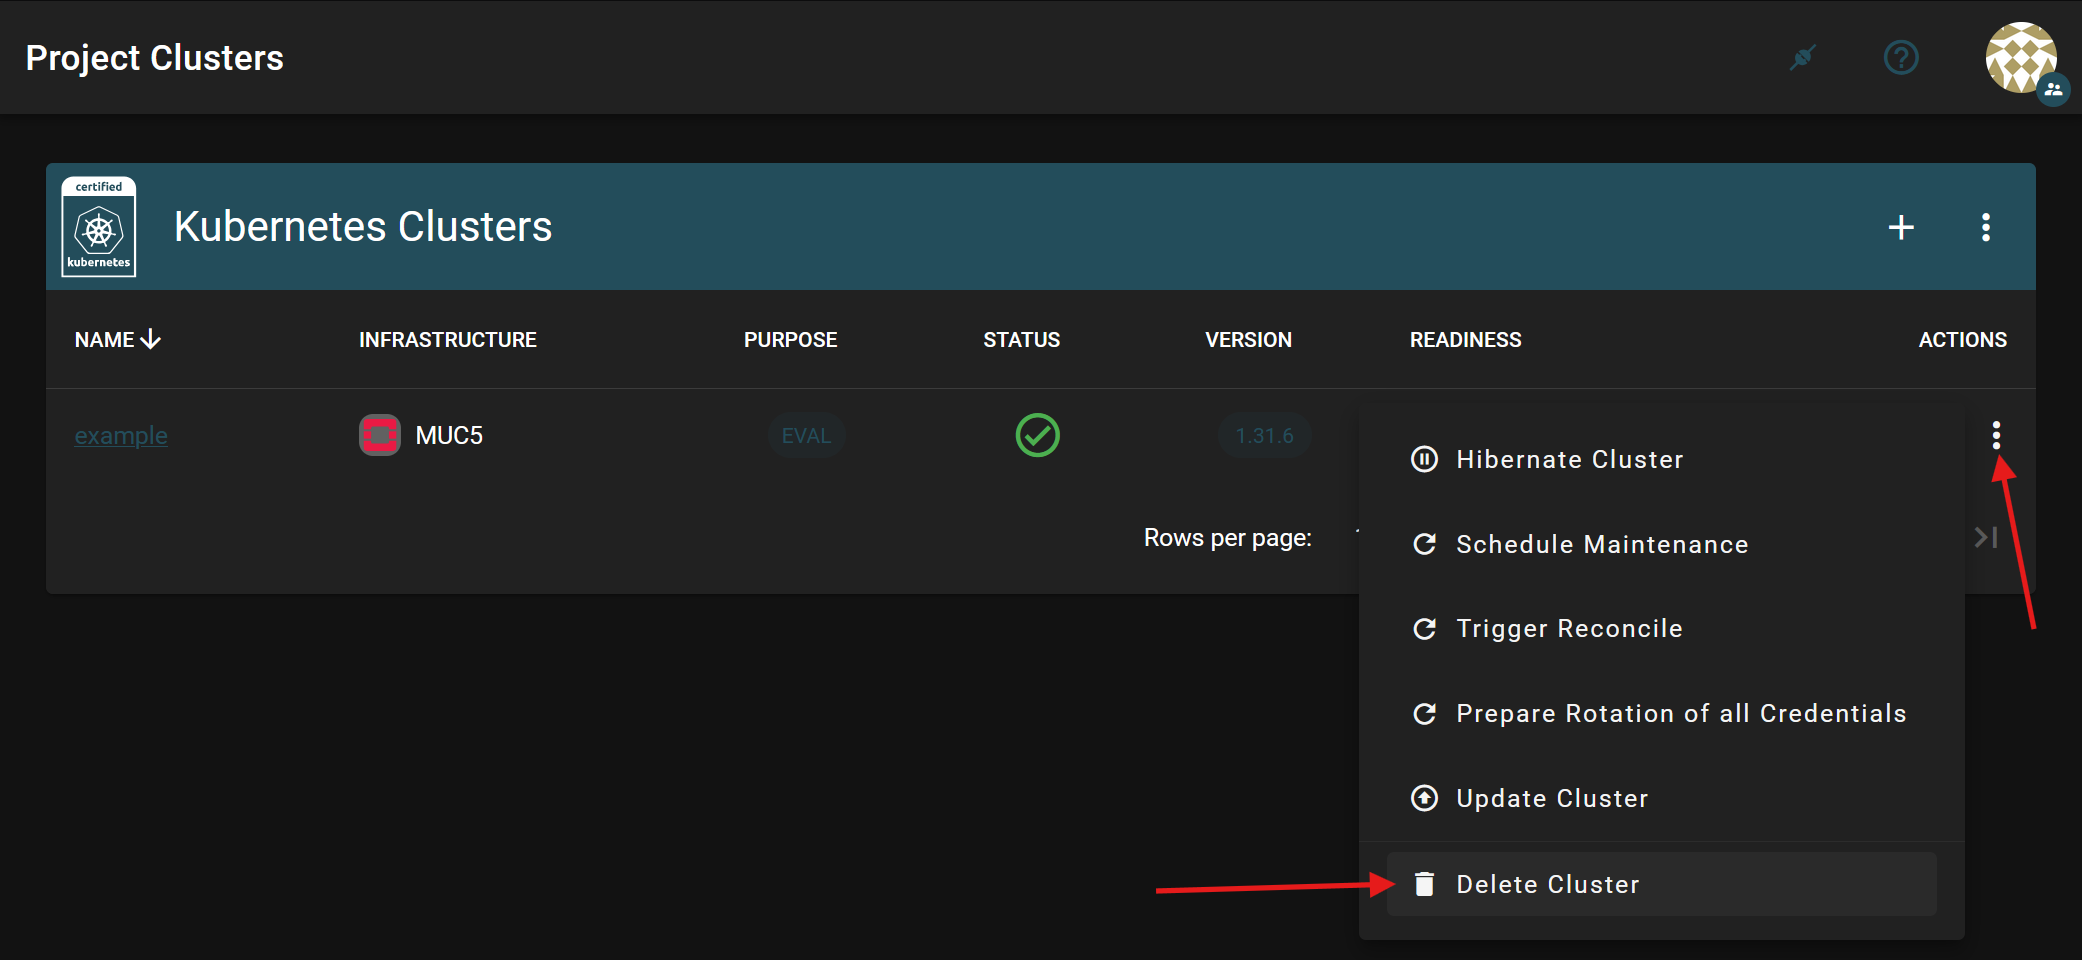
Section titled “Deleting a Cluster”To delete a cluster, click on the three dots on the left side of the cluster overview and select “Delete Cluster”.
The deletion is explained in detail in the upstream documentation. Deletion of the VMs uses the normal OpenStack VM deletion mechanisms.